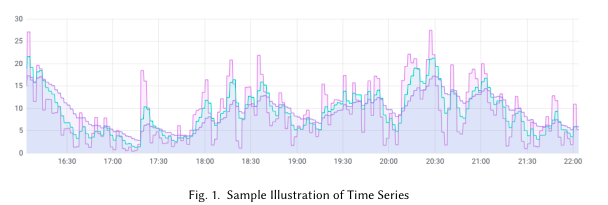
I have started my Masters in Computer Science and Engineering this February having Data Science as the major. I was always curious about writing thesis papers and doing research in Machine Learning and Data Science. This opens up my opportunity of doing so after many years.
In this series, (probably a series) we will see some specific markups tags to create a LaTex file for your thesis paper or anything.
LaTeX is a document preparation system. Normally we are used to with “What You See Is What You Get” (WYSIWYG) editors where we all have easy options to format a document, for example, text formatting bold, italic, adding images or adding titles etc. In LaTeX, you do it all yourselves in plain text with special markups and then the output is formated as you expected. Is it very hard? Not at all. If you know to code (even only HTML) you can do it in minutes otherwise you will need a few hours to make work for you.
We will learn some of the most used markups formats that we can use in our papers. At first, I would suggest you use Overleaf which I found the easiest editor which is fully online or cloud-based. You will find many templates readily available to use. Some popular formats are similar to accepted formats of IEEE, ACM etc.
Abstract
The first thing in the paper, after author names and paper names, will be an Abstract.
\begin{abstract}
In this part you can write your abstract in plain text. The "begin" and "end" tag will make the document processor understand that this is the abstract part.
\end{abstract}
Sections & Subsections
Sections are one of the core structure parts of the paper. Sections can have subsections too. Sections will have serial number associated with it. The serial numbers will be auto generated one after one. Subsections will follow the same rule.
\section{NAME OF THE SECTION HERE}
Description of the section. This probably will be a long paragraph of text.
\subsection{NAME OF THE SUBSECTION HERE}
This will the paragraph of subsection 1.1.
\subsection{NAME OF THE SUBSECTION HERE}
This will the paragraph of subsection 1.2.
\section{NAME OF THE SECTION HERE}
This will the paragraph of section 2.
Result of the text above will be something like this:

Images
You will need to upload the image file (say any jpg or png) in the document folder. Then you use the following block to add an image. can use the following tags to

\begin{figure}
\centering
\includegraphics[scale=0.4]{image_memo.png}
\caption{Time-Series Forecasting: Methods and Models in Machine Learning}
\end{figure}
Interestingly, LaTex will not exactly place the image where you have put the tags. It will find a suitable place and put it. This makes it difficult if you want the image in the exact same place. So, solve this add this extra [!htb] tag. This will override LaTeX default mechanism.
\begin{figure}[!htb]
\centering
\includegraphics[scale=0.4]{image_LSTM.png}
\caption{Illustration of LSTM Architecture}
\end{figure}
Btw, if you are facing any problems even after adding the right codes, make sure you have loaded the Graphics package in your LaTex at the beginning/header part of the document by adding this line of code:
\usepackage{graphicx}
Line Spacing
You press “Enter” to add line breaks or even add “//” to instruct LaTex to add a line break, that sometimes might not work as expected. To solve this you can use this tag “\vspace{0.3cm}”. Here 0.3cm is the amount of space you want to have. It can be what you exactly want.
\vspace{0.3cm}
Sharing and Collaboration
Good thing is you can share your Overleaf document with your teammates. 2 persons can also edit it by collaborating at the same time like Google docs. Click on the “Share” options from the menu of top right corner and you will be able to see the Share menu with necessary options. Turn on the link sharing to get a easily shareable link. You can also add the email addresses of the teammates. The persons will be notified via email to accept the invitation.

I will keep updating this post time to time. Thank you!
